Posts

Sitting and kneeling on a bellyak

High Performance Bellyak Training: Volume II

In High Performance Bellyak Training: Volume I, we focused on lower lumbar stability and how it enhances the prone position while paddling. Also life. But what comes first, flexibility or stability? The egg. In other words, if the body cannot stabilize itself correctly – no matter how flexible you are it will find another (read incorrect) way. Ultimately, this will lead to stiff joints and uncomfortable exercise.

Now that we are all confused, let’s get in there and get mobile! In this volume, we’re aiming for functional posture and optimal performance on the water.

Stabilizing the Lower Back

Let’s start out with another key Foundation Training exercise: “Prone Decompression”. A perfect tool for all you prone paddlers! This is a great continuation from last week, as it teaches you how to stabilize the pelvis and elongate your torso.

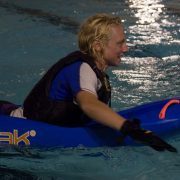
Moving to the bellyak

Now your lower back is balling, let’s step it up a notch. Transitions on the bellyak are not necessary but important to learn if you want to get into more advanced pellyaking. Being able to transition quickly from prone to kneeling is helpful when surfing a wave or if you just want to change up your paddle position.

Sitting and kneeling on a bellyak

Using Training Accessories

What better way to work on stability, than finding a stability ball and bringing back the ol’ knee tuck (below). When you first do this one work on stabilizing your core muscle groups and doing it slowly and with proper form. To break it down, place your hands shoulder width apart and place your feet onto the ball. Make sure your pelvis isn’t sagging. Use your core activating muscle technique we learned last time by gently squeezing your thighs together to protect and strengthen your lower spine and go ahead and imagine sinking your belly button back into your spine. This should activate the majority of the muscles that connect to your pelvis, aka your core muscles. Take a big inhale and as you exhale tuck your knees into your chest. Do this nice and slow as you might be wobbly at first, in 3 or more sets of 5-10. Make sure you continue to support your stabilizing core muscles. As time passes, try doing it quicker while still maintaining proper form and you will be on your way to becoming an elite bellyak trickster. 

Mastered the knee to chest? There are loads of great stability ball exercises to get your core rockin’!

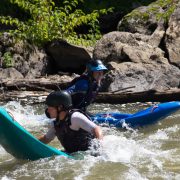
So why all the exercises?

Let me explain with a story. Grab some tea and a loved one and settle in for this one. Once upon a time on the Ocoee river in Eastern Tennessee, I was getting my surf trick on. Really feeling confident and nervous all at the same time as the eddies were full of Mambas watching me in between spotted roll practices and hand of God rescues. I went to go for what seemed to be the easiest surf transition; Prone to kneeling. Only to find out I had one type of muscle group, slow and not reactionary. It wasn’t going to cut it. I may have been strong at that point in my bellyak career, but quick I was not. The time that elapsed from my prone to kneeling position was enough to kick me off the wave every time. Horrified and ashamed, I paddled the rest of the way down the river, belly down to go on with my quest for faster muscles.

High Performance Bellyak Training: Volume 1

Bellyaking may be a new sport, but you don’t have to reinvent the wheel to train for it. It’s accessible to everyone – from 8 to 80 – but as with any paddle/water sport, there are a few things you can do in training that will better prepare yourself for time on the water. Read on for answers to commonly asked questions, and tips and tricks to help take your bellyak skills to the next level.

Q1: Doesn’t that hurt your back?

Only if you want it to. Back pain from sports is more commonly related to sitting and standing incorrectly as well as poor posture and core strength, not the sport itself. According to Eric Goodman of Foundation Training, many of us have adopted a movement program that doesn’t allow us to use the strongest muscles in our body properly. Ready to change that? Grab your bellyak and let’s go!

First, it’s important to note the bellyak has an ergonomic design which supports the prone position while paddling. This eases tension in the lower spine. It also allows the paddler more contact with the water so you can dig deeper and paddle stronger. If you are ready to beef up your game and become a more aggressive paddler, full-functioning muscle groups combined with flexibility are a must. I guess this is the part in the article where I am supposed to say if you have any pre-existing back conditions, consult your doctor and don’t take my word for it.

Q2: Where do I start?

Keep it simple. Your pelvis and lower spine are the most mobile areas of your body and so need the most stability and flexibility training to increase muscle control. Working on these areas will allow you to go from version 1 athlete, to a higher functioning version 2 athlete. You’ll be like a baby discovering it’s neck muscle! Proud moments!

Bellyaking with a stiff lower back

Version 1 – a less flexible lower back

Bellyaking with a more flexible back

Version 2 – a more flexible back

How to begin functional training

Let’s break down a couple of basic moves. My favorite is the classic yoga pose Sanskrit calls Salabhasana. Say it with me: SAL-AB-HASANA. If you are unable to pronounce the word you can also call it by its street name – Locust Post. Let’s try it!

Start with just the upper body. The majority of us can put ourselves into this position no problem, but remember we are retraining muscle groups to be full-functioning, so before you pop up as high as you can possibly go consider strength first. When we activate the muscles in our lower spine it adds stability versus just recklessly stretching and bending muscles, tendons and ligaments.

While lying face down, place an  object you dare not lose in between your thighs (see below). To hold the object in place you will need to squeeze your inner thighs together, which in turn activates the muscles and ligaments around your lower spine. From there, gently raise yourself a few inches off the ground, pressing the tops of your feet into the ground and lengthening your spine. Take 5 or so deep breathes, rest, and repeat 4-5 times. Wrap it up with a counter pose like child’s pose. Once you feel under control with this move you can add legs. I recommend giving it a few days before you add legs. Remember to keep it simple so you can retrain your body to function more effectively.

The first half of Locust Pose

Cobra pose with extended arms

Extend Arms for More of a Challenge!

Finish with Child's Pose

Finish with Child’s Pose

That’s enough yoga for today!

The next step of functional training

Now let’s add in some core strength! We are a big fans of Foundation Training, developed to facilitate the body’s natural healing ability and quickly improve degenerative movement patterns. The next exercise – The Founder – could be a game changer for everyone, whether you bellyak or not! Here’s a quick tutorial to get you going:


***No banjos were harmed in the making of this blog post and author, Jamie MacLeod, makes no promise to the results you may see.***